Key Takeaways
| # | Topic | Description |
|---|---|---|
| 1 | Understanding Light Temperature | Kelvin (K) measures light temperature; higher K values indicate cooler light, while lower values represent warmer light. |
| 2 | Impact of Light Temperature on Color and Mood | Light temperature significantly affects color and mood in product photos. Explore how warmer or cooler light enhances specific features. |
| 3 | Adjusting Light Temperature | Learn to use white balance tools and gray cards to fine-tune light temperature settings, ensuring accuracy during or after photography. |
| 4 | Choosing the Right Light Temperature for Products | Different products require specific temperatures for optimal presentation. Discover ideal temperatures for jewelry, clothing, and more. |
| 5 | Utilizing Different Light Sources | Natural, artificial, or mixed light sources each contribute distinct temperatures and effects to product photography. |
| 6 | Modifying Light Temperature with Tools | Experiment with filters, gels, and color correction tools to add creative effects, making your product photos stand out. |
| 7 | Recommended Product: Amazon Basics Portable Photo Studio | Introduce the Amazon Basics Portable Photo Studio, a versatile solution for product photography with quick setup and LED lights. |
| 8 | Important Statistics | Ground your knowledge with essential statistics, such as the ideal color temperature for product photography being around 5,000 K. |
| 9 | Conclusion | Mastering light temperature in product photography is an art that elevates your images, leaving a lasting impression on your audience. |
In the fast-evolving world of product photography, understanding light temperature is pivotal to achieving captivating visuals. In this comprehensive guide, we delve into the nuances of choosing the right light temperature, ensuring your products shine in the best possible light.
Understanding Light Temperature
Understanding light temperature is akin to mastering the artist’s palette. Imagine it as the invisible brushstroke that paints your products in the perfect hues, setting the stage for a visual spectacle.
Light temperature, measured in Kelvin (K), is the characteristic color of light emitted by a light source. The scale ranges from warm tones at lower temperatures to cooler tones at higher temperatures. It’s a crucial metric, providing insights into the ambiance and visual impact of your product photos.
Impact of Light Temperature on Color and Mood
Light temperature significantly influences the color and mood of your product photos. A warmer light might enhance the richness of wood products, while a cooler light can make metallic objects pop. Understanding this interplay between light temperature, color, and emotions is essential for creating visually compelling and emotionally resonant product images.
Color Harmony and Representation: The color temperature, measured in Kelvin (K), determines whether the tones in your product photos lean towards warm or cool hues. For instance, lower Kelvin values produce warmer tones with a reddish or orange cast, ideal for creating a cozy and inviting atmosphere. On the other hand, higher Kelvin values result in cooler tones, conveying a sense of freshness or professionalism. Striking the right balance is key to ensuring that your product’s true colors are faithfully represented, resonating authentically with your audience.
Emotional Impact: Beyond mere representation, light temperature has a profound impact on the emotional response of viewers. Warm temperatures evoke feelings of comfort, intimacy, and sometimes nostalgia, making them suitable for products associated with relaxation or tradition. In contrast, cooler temperatures can instill a sense of modernity, freshness, or even clinical precision, making them ideal for products with a contemporary or high-tech appeal. Understanding these emotional nuances allows photographers to consciously align the visual elements of their product photos with the desired brand or product image.
In practice, this means that when photographing a cozy blanket, opting for a warm light temperature can enhance the feeling of warmth and comfort associated with the product. Similarly, for a sleek electronic gadget, a cooler light temperature might emphasize its modern design and cutting-edge features.
Applying Creativity: Moreover, the psychological impact of light temperature can be harnessed creatively to guide the viewer’s perception and influence their decision-making process. Consider a product image with warm lighting, showcasing a piece of rustic furniture in a well-lit room. This not only highlights the details of the furniture but also creates a sense of homeliness, potentially influencing a buyer looking for items to furnish their home.
Adjusting Light Temperature
Achieving the perfect light temperature is an art form that goes beyond the technicalities. Understanding the nuances of light temperature, is essential for capturing the essence of your products and conveying the right emotions to your audience.
The Kelvin Scale Demystified
To embark on this journey, it’s crucial to comprehend what light temperature truly signifies. The Kelvin scale, ranging from approximately 2,000 K to 9,000 K in photography, quantifies the color of light. Lower temperatures represent warmer tones, while higher temperatures produce cooler, bluish hues. The ideal color temperature for product photography hovers around 5,000 K, offering optimal color balance and representation without the need for extensive editing or filters.
White Balance Tools and Gray Cards
Now, the practical aspects of adjusting light temperature. Whether you’re in a studio setting or working with natural light, utilizing white balance tools or a gray card can make all the difference. These tools help neutralize unwanted color casts, ensuring that the colors in your photos appear true to life.
In your camera settings, the white balance tool allows you to select the appropriate temperature preset or manually adjust the temperature until you achieve the desired effect. Alternatively, using a gray card in your scene provides a reference point for accurate color calibration during post-processing. This step ensures that the whites in your photos are truly neutral, setting the foundation for accurate color representation..
Choosing the Right Light Temperature for Products
Choosing the appropriate light temperature for your product photography is an art that goes beyond the technicalities of camera settings. It involves a deep understanding of the characteristics and desired presentation of each product. Let’s explore how different types of products can benefit from specific light temperatures to enhance their visual appeal.
Jewelry Photography:
When it comes to showcasing intricate jewelry pieces, the right light temperature is paramount. A cool light temperature in the range of 5,000 K to 6,500 K can bring out the brilliance of gemstones, creating a dazzling effect. This temperature range not only ensures accurate color representation but also highlights the fine details of each piece. Warm temperatures may introduce unwanted color casts or diminish the sparkle, making it crucial to tailor the light temperature to accentuate the unique features of jewelry.
Clothing Photography:
For capturing the texture, color, and overall feel of clothing items, a neutral light temperature around 5,000 K is often recommended. This temperature strikes a balance, preventing color distortion and ensuring that fabrics appear true to life. The challenge lies in maintaining consistency when photographing garments of diverse colors and materials. Photographers may experiment with different temperatures within the neutral range, adjusting as needed to complement the specific characteristics of the clothing. The goal is to achieve images that accurately represent the product while inviting potential customers to visualize themselves wearing the attire in various settings.
Food Product Photography:
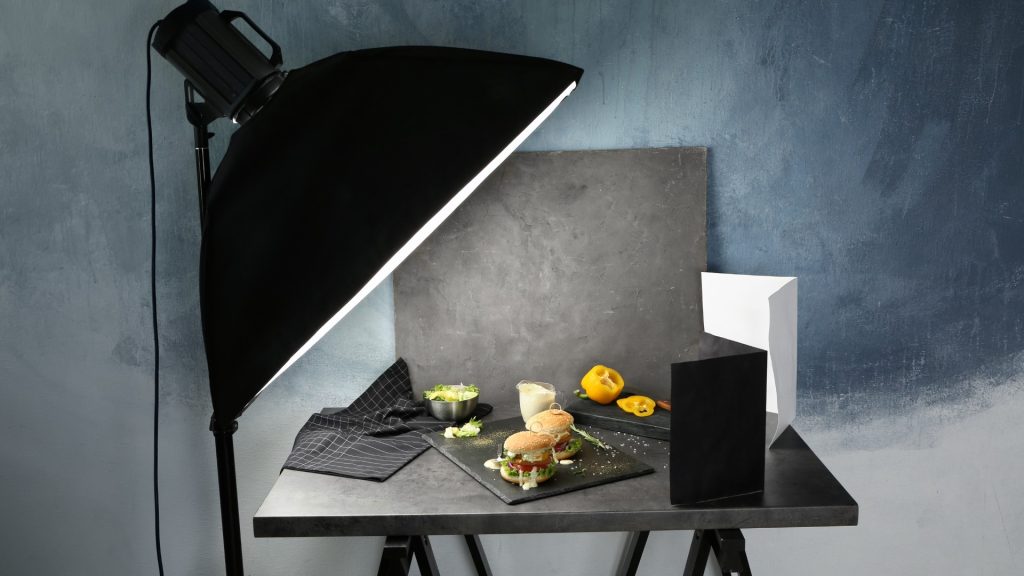
When it comes to capturing the delicious details of food items, the right light temperature plays a crucial role in making them look appetizing. Warm temperatures around 3,500 K to 4,500 K are often preferred for food photography as they enhance the golden tones of cooked dishes and bring out the richness in colors. This temperature range can evoke a cozy and inviting atmosphere, making the viewer feel a connection with the food. However, it’s essential to strike a balance, as excessive warmth might distort the natural colors of fresh ingredients. Achieving the perfect light temperature for food photography involves a delicate dance between warmth and vibrancy.
Technical Considerations:
While these recommendations provide general guidelines, it’s crucial to consider the technical aspects of your camera equipment and lighting setup. Some cameras may have slight variations in color reproduction, and different light sources can influence the perceived temperature. Regular calibration and testing are essential to ensure consistency in your product photography. Moreover, understanding the specific color temperatures that work well for your niche can set your product images apart, contributing to a cohesive and visually appealing brand aesthetic.
Utilizing Different Light Sources
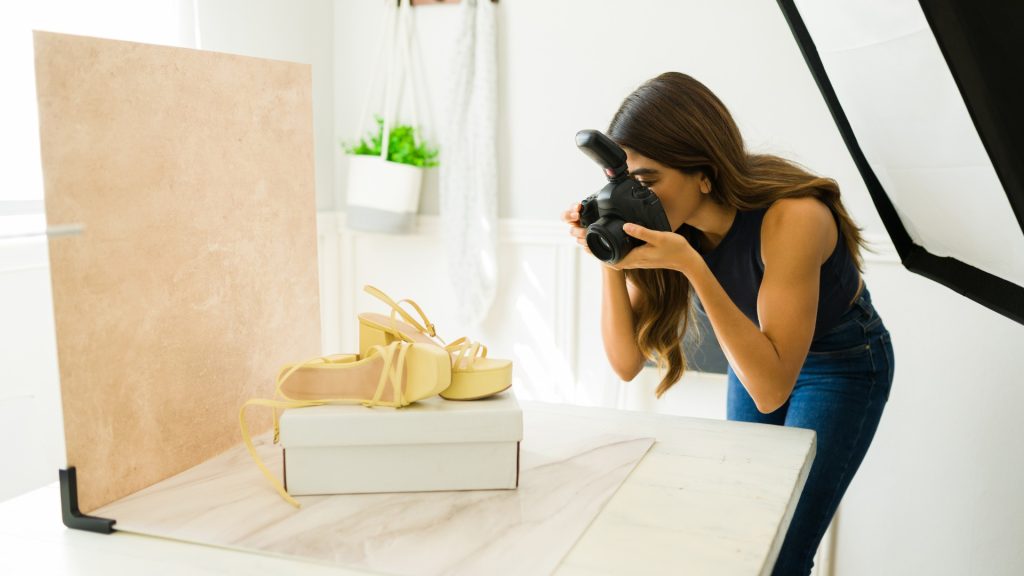
Harness the power of various light sources – natural, artificial, or a blend. The type of light source you choose can significantly impact the temperature and overall mood of your photos. Experimenting with natural light, artificial light, or a combination of both allows for endless creative possibilities.
- Natural Light: The dynamic, ever-changing quality of natural light adds a touch of authenticity to your product photos. Consider shooting near windows during the golden hour for warm, soft tones.
- Artificial Light: Controlled and consistent, artificial light sources such as LED lights, fluorescent lamps, or tungsten bulbs provide reliability and precision. Adjusting the color temperature of these lights allows for customization based on the desired mood.
Best Lights for Product Photography: Quote: “The best lights for product photography are a combination of one or two high-quality continuous lights.” (Source: John Mak Photography)
Modifying Light Temperature with Tools
In the field of product photography, creative expression has endless possibilities. Filters, gels, and color correction tools act as versatile tools, allowing you to adjust light temperature and add unique effects.
- Filters and Gels: Experiment with color filters and gels to add a touch of warmth or coolness to your lighting setup. These accessories offer a versatile way to infuse creativity into your product shots.
- Color Correction Tools: In post-processing, leverage tools like Adobe Lightroom to fine-tune color temperature selectively. This provides the flexibility to enhance specific aspects of your photos without affecting the overall balance.
Recommended Product: Amazon Basics Portable Photo Studio
Introducing the Amazon Basics Portable Photo Studio – a versatile solution for product photography. Quick setup, LED lights, and a range of features make it an asset for amateurs and professionals alike.
In the fast-paced world of product photography, having the right tools at your disposal can make all the difference in achieving professional-grade results. The Amazon Basics Portable Photo Studio emerges as a game-changer for photographers seeking convenience, versatility, and consistent lighting in their endeavors. With a design that prioritizes ease of use, this portable studio eliminates the complexities of traditional setups, making it an ideal companion for both beginners and seasoned photographers.
Important Statistics
To truly master the art of product photography, it’s essential to ground your techniques in empirical knowledge. Understanding key statistics related to light temperature not only refines your approach but also empowers you to make informed decisions that significantly impact the visual outcome of your work.
Color temperature, measured in Kelvin (K), serves as a foundational metric in photography, ranging from the warm tones at around 2,000 K to the cool tones exceeding 9,000 K. A critical insight for product photographers is that the ideal color temperature for product photography often hovers around 5,000 K. This sweet spot provides the best color balance and representation without the need for extensive filters or post-processing interventions.
Moreover, acknowledging that lighting described as “daylight” can vary between approximately 4,700 K to 6,500 K is pivotal. While this range might seem broad, understanding its nuances allows photographers to navigate the subtleties of specialized product photography. It becomes particularly crucial when dealing with items that demand specific color accuracy, such as clothing or food products.
Armed with these statistics, product photographers can strategically employ light temperatures to their advantage. By aligning their techniques with these numerical guidelines, they ensure that their images not only meet industry standards but also stand out with vibrant, true-to-life colors that captivate their audience. In the dynamic field of visual storytelling, these statistics serve as the compass, guiding photographers to create images that not only meet but exceed the expectations of their clients and viewers.
Conclusion
In conclusion, mastering the intricate interplay of light temperature in product photography is not merely a technical skill; it’s an art that transforms mundane images into visual narratives. Armed with the understanding of Kelvin measurements, the impact on colors and moods, and the diverse tools at your disposal, you possess the keys to unlock the full potential of your product photos. As you embark on this journey, experimenting with different light sources, adjusting temperatures to suit various products, and incorporating creative modifications with filters and gels will elevate your photography game. Remember, the artistry lies not just in capturing products but in crafting visual stories that resonate with your audience. So, go ahead, illuminate your products, leave a lasting impression on your audience.
Further Reading:
1. Natural Light vs. Artificial Light in Product Photography
Unravel the debate between natural and artificial light, exploring their unique contributions to light temperature and product aesthetics.
2. DIY Lighting Hacks for Product Photography
Dive into creative DIY solutions to manipulate light temperature, offering cost-effective alternatives for stunning results.
3. Choosing the Right Background for Product Photos
Investigate the impact of backgrounds on light temperature and discover how the right choice can enhance your product shots.
4. Essential Equipment for Product Photography
Explore the must-have tools and equipment that contribute to achieving the perfect light temperature in product photography.
5. Color Accuracy in Product Photography: Tips and Tricks
Delve deeper into achieving color accuracy, understanding the nuances of color representation in product photography.
FAQs
What is the ideal light temperature for product photography?
The ideal light temperature for product photography is around 5,000 Kelvin (K). This temperature provides the best color balance and representation, ensuring your products appear vibrant and true to life in photos.
How does light temperature impact product colors in photos?
Light temperature significantly influences the colors in product photos. Warmer temperatures enhance richness, making certain materials appear cozier, while cooler temperatures can make metallic surfaces stand out. Understanding this impact is crucial for achieving the desired visual effects.
Are natural light or artificial light better for product shots?
The choice between natural and artificial light depends on the specific goals of your product photography. Natural light can create a soft and diffused look, while artificial light offers more control. Experimenting with both can help determine which suits your product and style best.
What tools can help control light temperature in photography?
Tools like white balance cards and gray cards are instrumental in controlling light temperature in photography. They aid in achieving accurate color representation by providing reference points for adjusting the white balance settings in your camera or during post-processing.
Can I use a smartphone for product photography, or do I need a professional camera?
Both smartphones and professional cameras can be used for product photography, and the choice depends on your requirements. While smartphones offer convenience and portability, professional cameras provide more advanced features and manual controls. Choose the equipment that aligns with your specific needs and goals.

